Using the CVS output visualization
For using the CVS output visualization, only few things are to do:

All configuration is done now. From now, executing a CVS command you chose to parse will result in a graphical presentation of the CVS output.
The checkout, update, export commands
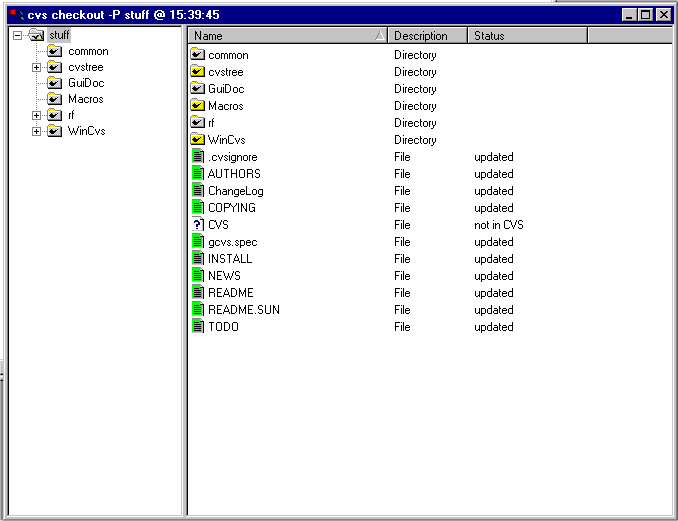
For the commands checkout, update, export you will get a window like this:

You will be presented a typical Windows Explorer-like tree/list view which contains the directory structure of the CVS output. On the left side, only directories are shown while the right sides shows both directories and files along with their status (this is the letter CVS usually prints in front of a file name, e.g. 'U' or 'M'). An icon indicates the status as well. The color code:
 U - Updated
 A - Added
 R - Removed
 M - Modified
 C - Conflict
 ? - not in CVS
The columns on the right side are the following:
Name: File and directory name, relative to the currently selected folder
Description: A description of the object (e.g. file or fir)
Status: The status of the file. See the above list for possible statuses or the CVS manual for their explanation
The splitter you see in between the tree and the list view can be moved to left or right in order to change the width of the either view. This setting is stored permanently.
You can sort the list view ascendant or descendant by any column. Click the header of the column you want the list to be sorted by; a small triangle appears on the right side of column header. Subsequently clicking the same column toggles ascendant/descendant sorting. The triangle showing up means ascendant sorting, down - descendant.
Filtering/flat mode

You can use standard WinCVS filtering methods to filter the files in the CVS output window. You can also toggle the flat mode:

Flat mode:
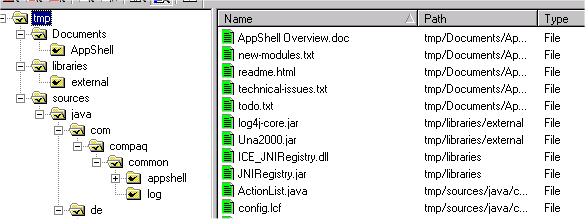
If enabled, all files are displayed along with their path: a "flat" directory structure:
File filters:
 Show modified files only
 Show added files only
 Show removed files only
 Show conflict files only
 Show all of the above
 Show unknown files only
 Hide unknown files
The status command
Using the status command parsing follows a different idea. Usually, you select several files and press the status button  in order to see their status. If the status command parsing is enabled, the procedure changes:

The Remote rev. column shows the newest revision available on the server. The Remote status is the current status of the file returned by the CVS status command. It can be one of the following:
Up-to-date
The file is identical with the latest revision in the repository for the branch in
use.
Locally Modified
You have edited the file, and not yet committed your changes.
Locally Added
You have added the file with add, and not yet committed your changes.
Locally Removed
You have removed the file with remove, and not yet committed your changes.
Needs Checkout
Someone else has committed a newer revision to the repository. The name is slightly misleading; you will ordinarily use update rather than checkout to get that newer revision.
Needs Patch
Like Needs Checkout, but the cvs server will send a patch rather than the entire file. Sending a patch or sending an entire file accomplishes the same thing.
Needs Merge
Someone else has committed a newer revision to the repository, and you have also made modifications to the file.
File had conflicts on merge
This is like Locally Modified, except that a previous update command gave a conflict. If you have not already done so, you need to resolve the conflict.
Unknown
CVS doesn't know anything about this file. For example, you have created a new file and have not run add.
You can sort the list by one of these columns in the same way as by any other - simple click on the column header.